If you have been issued with an HP Elite x2 device, the "Clippy", then this session is for you. If not, then please move on to the next session.
In this session, you’ll start to become familiar with your new HP Elite x2 device, or what we commonly refer to as your “detachable”.
Your new device can be used with or without the keyboard, hence the name – “detachable”.
When the keyboard is detached it works like a tablet computer, using the pen or your fingers to type and interact with applications and web sites.
With the keyboard attached it works more like a laptop, with a TouchPad and keyboard. The bonus is that you can also still work using the touch screen – best of both worlds.
The screen is a touch screen. Touching or tapping the screen is like clicking with your mouse or trackpad. The difference is that with a touch screen you can use multi-fingered gestures to do more than just click.
At the top of the screen is the camera used to take your image or record a video. When the camera is in use, you’ll see a little light come on to the side of the camera.
To the left of the top edge is the power button. Press this to switch the device on. If the device is switched on and signed in to Windows 10, pressing the power button will shut down Windows 10 and switch off the device.
Across the top of the tablet are ventilation slots, be sure never to block these when the tablet is switched on. To do so will risk the tablet overheating and ceasing to function.
Towards the centre of the device is also where the microphones are located.
This is where the keyboard attaches to the tablet. Make sure these connection points never become damaged or filled with fluff and detritus as this will eventually result in the keyboard not connecting to the tablet.
To the rear of the tablet you’ll notice a rear facing camera, great for taking photos of busy white boards.
You’ll also notice the kickstand. It is hinged in the middle of the tablet so that you can gently pull it out to form a stand, allowing you to view the screen hands-free at various angles.
The kickstand cannot be folded all the way back on itself. To attempt to do so would break it, rendering the tablet virtually useless in the work environment.
When closing the kickstand, always make sure that there is nothing that will become trapped between the tablet and the kickstand as this may damage the tablet.
At the top of the left side is a 3.5mm audio in/out socket. Below this are the volume up and down buttons.
Immediately below this is a security locking point, used to physically lock the device to a desk or other heavy object.
At the top of the right side is a power light which becomes illuminated when power is connected to the device. If the light is white, the battery is charging and currently has a charge which is greater than 90%. If the light is amber, the battery is charging and has a charge of less than 90%.
When power cord is not connected to the device the light will blink amber when the battery is low. When the battery light begins blinking amber rapidly, the battery is critically low and you risk losing any unsaved data.
Below the light is a USB Type-C socket. In the office you should plug the USB Type-C cable on your desk into this socket. This will charge your device and connect it to your screens and the company network. When away from the office, you should plug the charging unit into this socket to power your device.
Beneath this first USB Type-C socket are two more. These can be used to connect peripherals to your device, such as a smart phone or camera, etc. This will not only allow you to use the peripheral, it will also charge it.
Further down the right side, where the kickstand slots in, is a Nano SIM card slot.
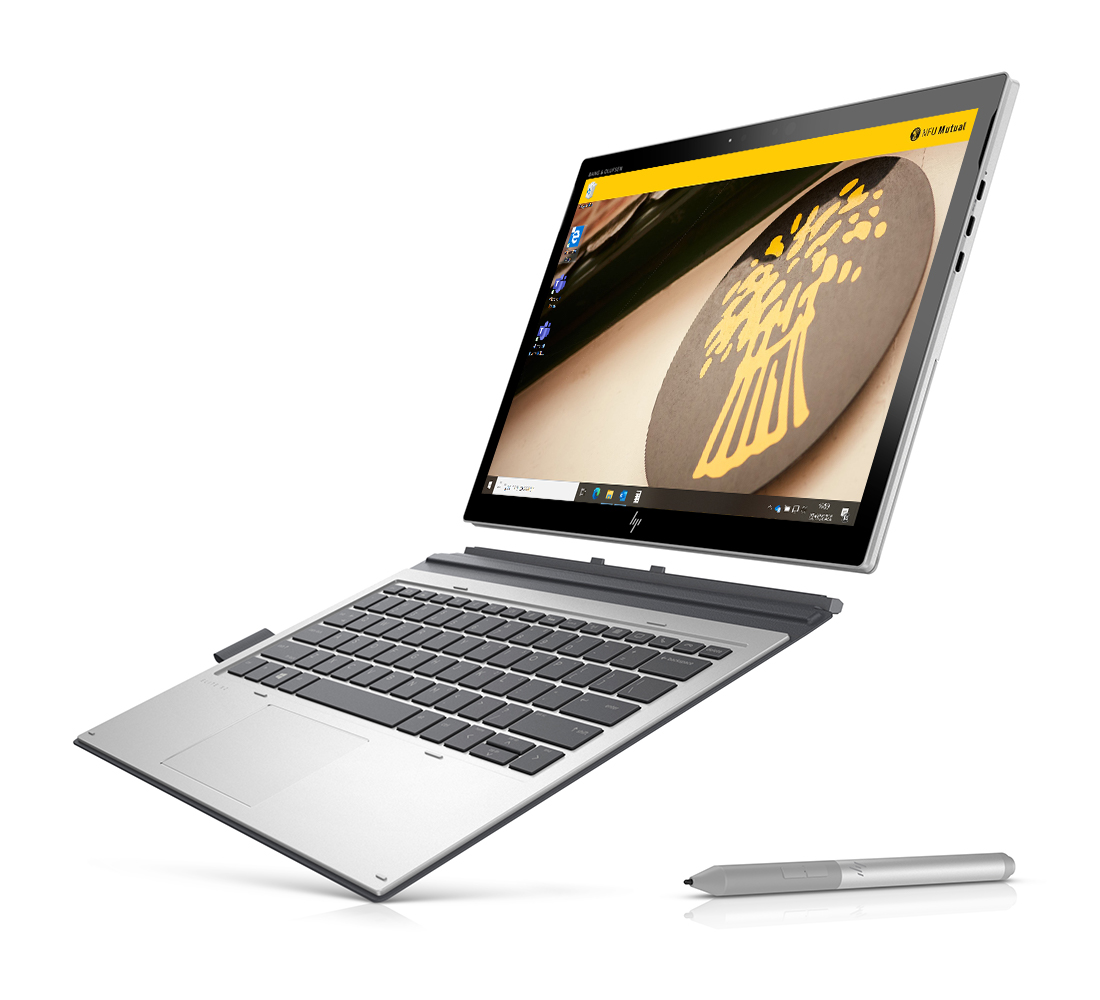
When presenting, taking notes in a meeting or collaborating with a colleague at their desk or in a collaboration space, it can often be easier to use your new device without the keyboard. Simply use the pen and touchscreen to present or take handwritten notes.
The keyboard can be detached and re-attached whenever you need. You don’t need to shut down or close any applications. Attach it or detach it when you want to, but do it carefully.
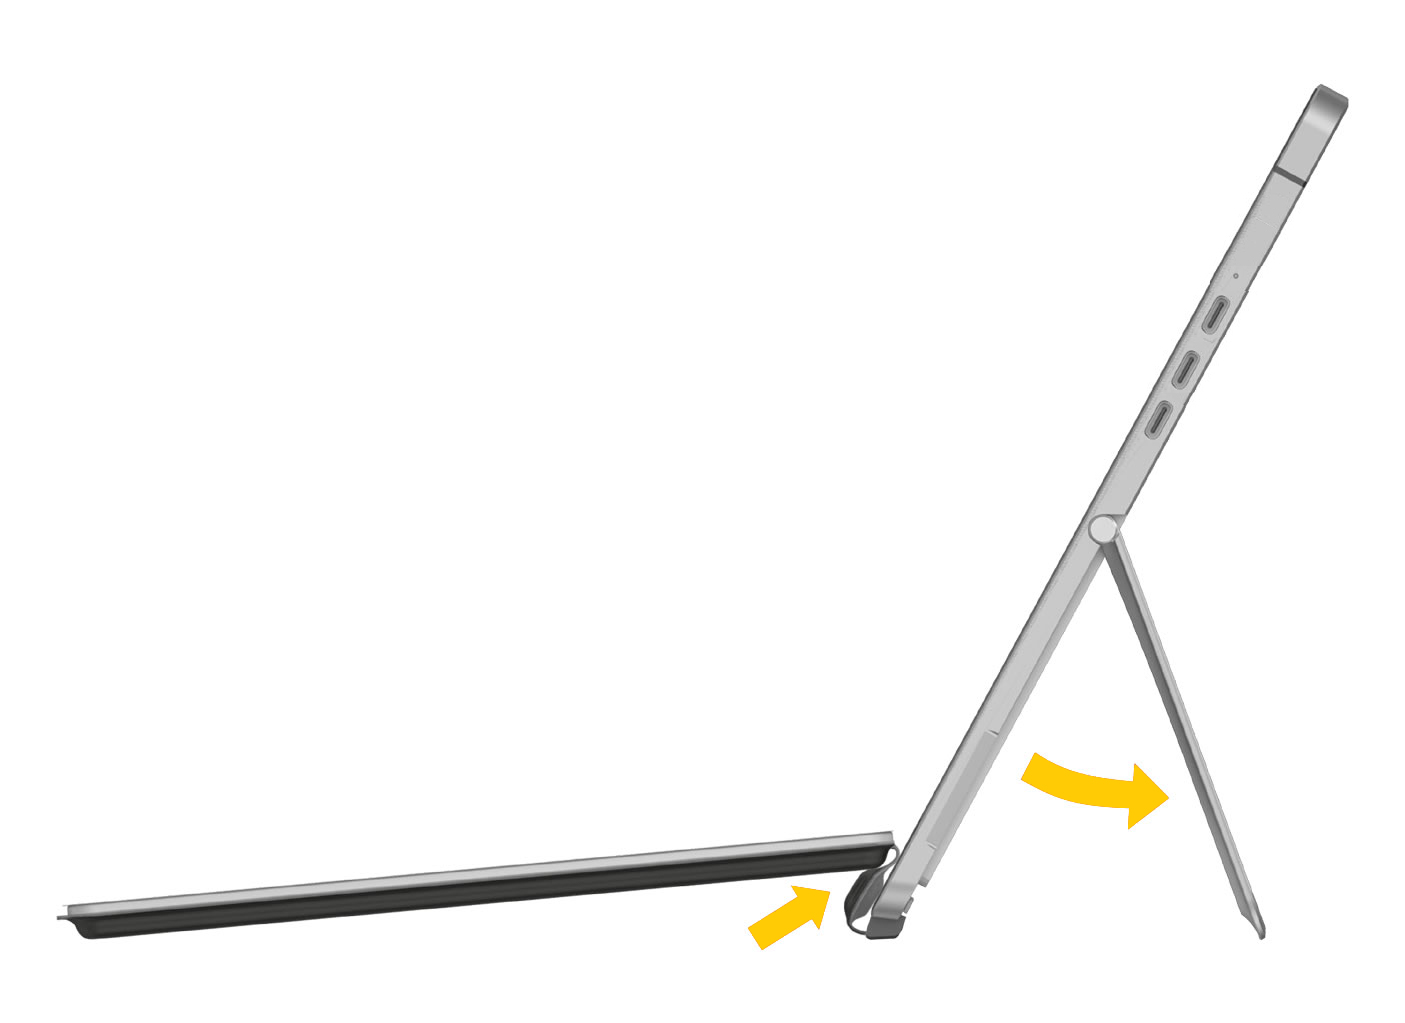
To attach the keyboard, bring the bottom centre of the screen close to the top centre of the keyboard. You’ll feel that the keyboard almost wants to attach itself to the screen. The strong magnets pull the two together and they join with a satisfying click.
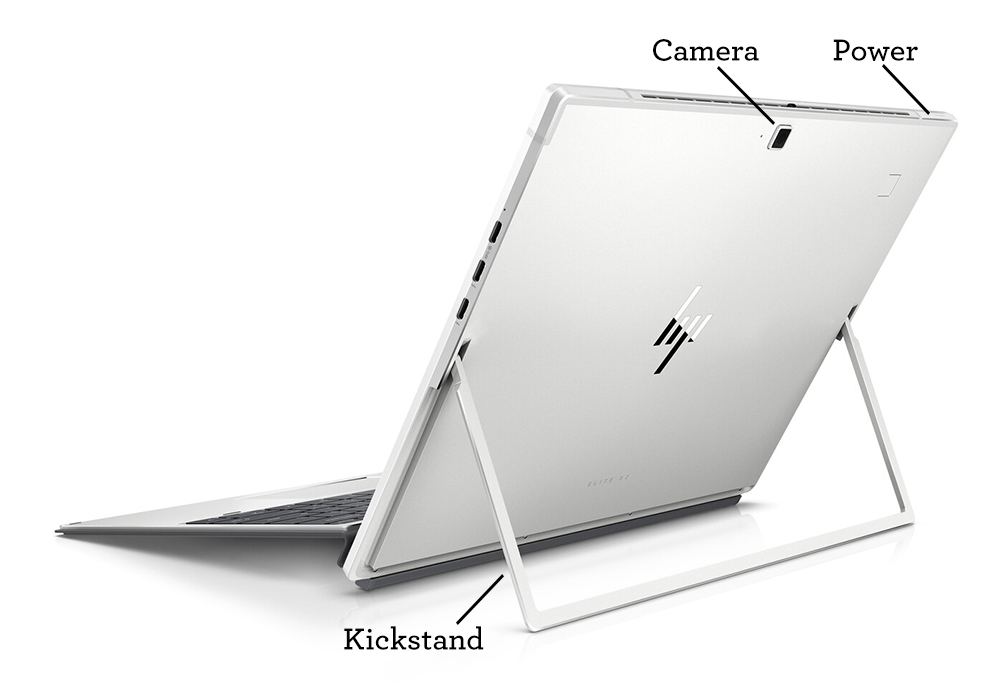
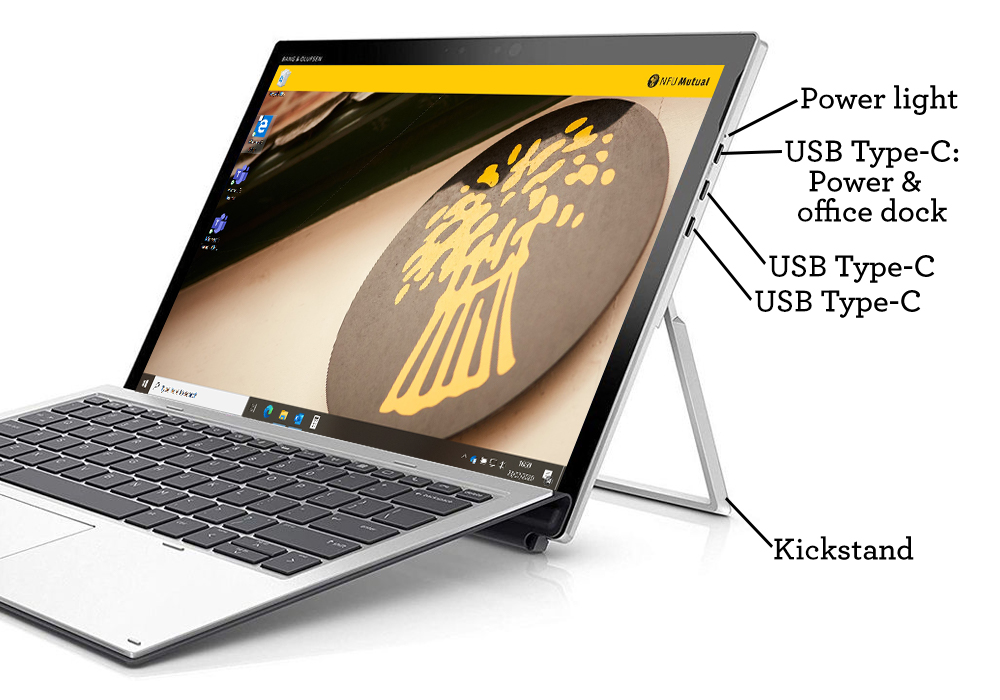
Once attached, you’ll need to use the kickstand to the rear of the screen to support the screen in an upright position on your desk – push it away from the bottom of the screen until the screen is inclined at an angle that is comfortable for you to use.
The keyboard can be lifted slightly at the rear to place the keyboard on a comfortable tilt.
To detach the keyboard simply pull it apart from the screen. Once detached you’ll be given the opportunity to switch your device to Tablet mode. In this mode the device is subtly reconfigured to make better use of the features of the tablet and places less reliance on there being a physical keyboard available to you as a user. Though there is always an on-screen keyboard available to you should it become necessary for you to type while using the device in tablet mode. To reveal the on-screen keyboard, tap the keyboard symbol in the lower right corner of the screen, in the taskbar.
You should practice using your device in both tablet and standard modes so that you get used to the differences.
When attaching or detaching the keyboard, always be gentle in what you do, and if you do have any applications open, be aware that if you inadvertently hold down any keys or touch the screen while detaching or attaching the keyboard, those keystrokes and screen taps may be included as typing or instructions within your application.
You may find it quick and easy to annotate documents and images using the pen that came with your device, rather than your keyboard. You can use the pen even when the keyboard is connected.
Using the pen and touchscreen, you’ll be able to mark-up documents and presentations.
Using your device in tablet mode can be a great way to instantly share your thoughts and present ideas. Simply draw or make annotations on the screen and share it with colleagues around the table.
The TouchPad helps you navigate your device’s screen and control the pointer using simple touch gestures. You can also use the left and right TouchPad buttons in the lower left and right corners of the TouchPad as you would use the corresponding buttons on an external mouse.
The TouchPad responds to multi-finger gestures. So, as well as tapping the TouchPad to simulate a left click, you can tap it with two fingers and that’s like a right-click.
Move those same two fingers up or down the touchpad and the screen will scroll with your fingers.
In some applications, you can place your thumb and forefinger on the TouchPad and then bring them together to zoom in; or move them apart to zoom out.
There are more gestures available than these, but that should be enough to get you started.
Your new Windows 10 device has been supplied to you with a pointing and control device in the shape of a pen. The way you use it is like a regular pen, the only difference is that instead of writing on paper, you write on your device’s screen.
Never use any other pen with your device – a regular ballpoint or fountain pen will damage the touchscreen.
You may need to charge your pen before you first use it.
You can store the pen by placing it up against the side of your device’s screen. There are strong magnets which will attach the pen to the screen. Make sure the nib of the pen is facing upwards, towards the top of the screen.
You can charge your pen with the same charging cable that you use to charge your device.
Towards the top side of the pen you’ll find a small rubber cap. Open the cap to reveal a socket for the charging cable.
When charging the pen, the indicator light between the pen’s two buttons (on the opposite side of the barrel) will pulse white. When charged the light will stop pulsing.
While the pen isn’t fragile, it is an expensive device which won’t stand up to being regularly dropped, chewed, or rolled over by your office chair. Care for it like you would the rest of your device.
While the pen will work as a pointing device without it being paired with your device, pairing it will give you greater control. Pairing only needs to be done once.
Reveal the Action Centre by holding down the Windows key and tap A. Click Expand to reveal all the tool options and make sure that Bluetooth is turned on.
Now take a look at the barrel of the pen. Between the two buttons is an indicator light. Press and hold down the button on the top of the pen until the indicator light flashes blue. In a few moments your device will report that it has found the pen, click Connect.
Your pen will now be paired with your device.
On the side of the pen’s barrel you’ll discover two buttons, one nearer the nib and one further away. At the top of the pen is another button.
Each button can be configured as to what it does. If you have a local Evolve365 Hero, they will be able to help you with configuring the pen’s buttons. Click here to locate your local Evolve365 Hero.
The nib of the pen is pressure sensitive. In some applications, this means the harder you press, the thicker the line that is drawn. But don’t go crazy, the pen requires a gentle touch.
Your device is equipped with two cameras. A front-facing camera in the space immediately above the centre of the screen. The second rear-facing camera is in the same position as the front-facing camera, but on the rear of the device.
The rear facing camera is great for taking site photographs, notes and whiteboards.
The front-facing camera is perfect for video calls and recording video blogs (vlogs).
Before you take any photos or record any videos, consider your surroundings. You need to be certain than no sensitive information is within the shot, especially if you don’t know who will be viewing the images or videos that you capture.
Make sure your subject is well lit – so if you are recording a video of you speaking, make sure there is a light source behind the camera, shining on your face. If you are photographing some notes, make sure the notes are well lit.
When you come to use your device in the office, you can connect it to your screens and the network all through the one USB-C cable. Simply connect the cable to the upper-most USB-C socket on the right of the device’s screen. Not only will this connect the device to the screens and network, it will also keep the device charged.