Starting, securing and stopping Windows 10

In this session, you’ll learn how to start your device and sign-in to Windows 10. You’ll then learn why and how to lock your device and then shut it down.

Get started

Skip to next session

Session at a glance

  • Turn on your device.
  • Review the NFU Mutual security warning notice
  • Sign-in with your username and password
  • Setting up and signing in with Windows Hello
  • Lock Windows 10
  • Shut down Windows 10

Get started

Skip to next session

Start up and sign-in to Windows 10

To get started, locate the power button on your device and press it. Moments later your device will begin to start up.

To sign in, press and hold down the Ctrl and Alt keys and tap the Delete key.

Read the NFU Mutual Security Warning Notice. If you can comply with it, click OK.

If your device is not directly connected to the NFU Mutual network with a network cable, i.e. you are using a portable device either away from the office or while not docked in the office, you should use VPN to connect to the network now.

To use VPN, first click the VPN tool in the lower right corner of the sign-in screen.

VPN tool

From the pop-up, make sure the Group is set to NFUM-SPLIT and then enter your password and secure token code as normal.

Cisco AnyConnect Sign-in dialogue

Once you are securely connected to the network you will see a padlock appear over the AnyConnect icon in your taskbar.

VPN tool

You can then log in with your user ID and password and press Enter or click the Go arrow to the right of the password text box.

Windows 10 login screen

You will be logged in and have access to Windows 10.

Tip

Never share your Windows user name and password. Everyone who should have access to our devices and network already has access. Please adhere to our data protection & information security policy.

Be sure to change your password regularly, but do not write it down or make it easy to guess.

Setting up Windows Hello

Windows Hello is a security feature which lets you sign in to your Windows 10 device using your fingerprint, your face or a PIN.

Not all devices support these Windows Hello features.

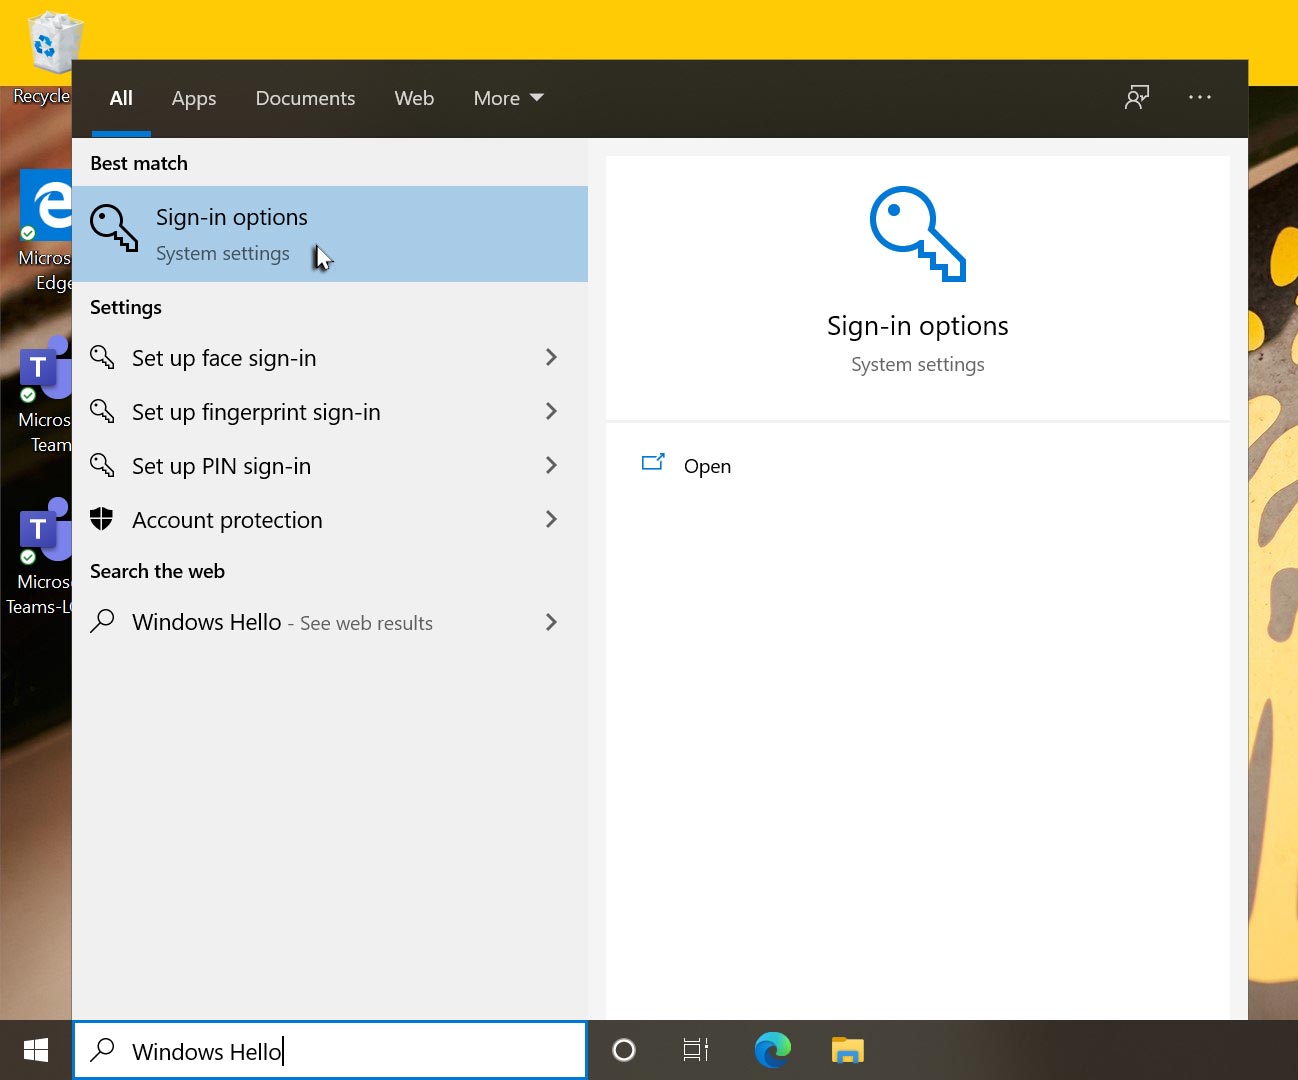
To set up Windows Hello, click into the Type here to search text box and type the words Windows Hello. When the search results appear, click Sign-in options.

Click here to search being used to search for Windows Hello

You can now choose to setup the feature(s) you wish to use.

Windows Hello Face uses facial recognition to sign you in to Windows 10. Click Windows Hello Face and, if it’s available, click Set up. Follow the instructions on screen and look at the camera until it has completed building a facial model. If it is suggested, click Set up a PIN, in case the facial recognition fails or is ever unavailable. Your PIN will need to be at least 6 digits long. Simply follow the on-screen instructions.

Sign in options settings dialogue box

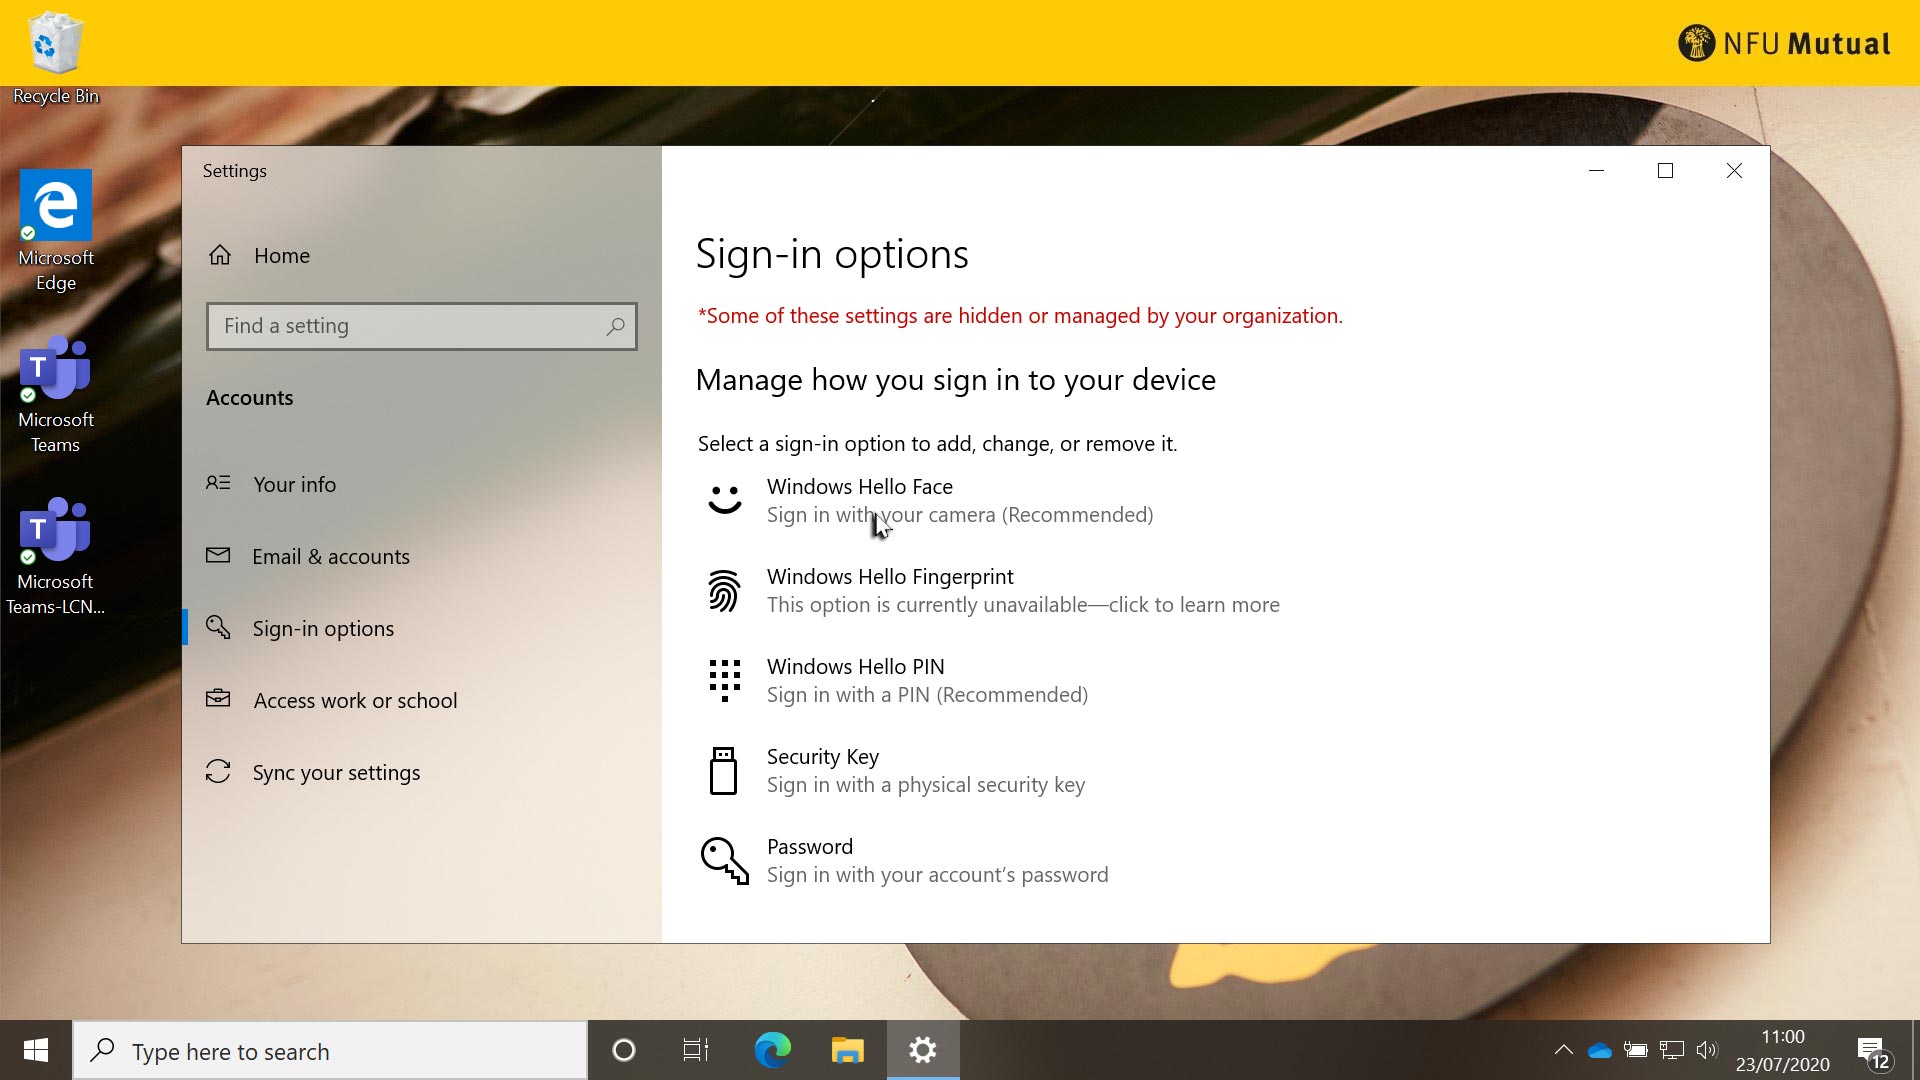
Windows Hello Fingerprint uses fingerprint recognition to sign you in to Windows 10. Click Windows Hello Fingerprint and, if it’s available, click Set up. Follow the instructions on screen and use the fingerprint reader on your device to provide a sample fingerprint for your chosen finger. You can add other fingers if you wish. If it is suggested, click Set up a PIN, in case the finger print recognition fails or is ever unavailable. Your PIN will need to be at least 6 digits long. Simply follow the on-screen instructions.

Windows Hello PIN lets you sign in using a six-digit PIN. To set up your PIN, if you haven’t already when setting up facial or fingerprint recognition, click Windows Hello PIN and click Set up. You’ll need to provide your NFU Mutual password and then you’ll be asked to provide a new PIN and then confirm that PIN. Now follow the on-screen instructions.

Now close the Settings window.

Signing in with Windows Hello

Windows Hello is a security feature which lets you sign in to your Windows 10 device using your face, fingerprint or a PIN.

The next time you need to sign in, if you have set up Windows Hello Face, look at the camera and you’ll be signed in. If you set up Windows Hello Fingerprint, place one of the fingers that you scanned onto the scanner and you’ll be signed in.

If you didn’t set up facial or fingerprint recognition, or if either failed, you’ll be asked for your PIN, type it and you’ll be signed in.

If you forget your PIN, click I forgot my PIN and type your Windows 10 password.

Lock and unlock Windows 10

Secure Windows 10 and your device when unattended. The quickest way to do this is to lock it.

Hold down the Windows key to the left of the Space Bar and tap the L key.

Windows L keys

To unlock Windows 10, press and hold down the Control and Alt keys and tap the Delete key. When asked, sign in to Windows 10 with either your password, or, if you’ve set up Windows Hello, use the feature you set up.

Wake up Windows 10 when it's asleep

If you don't use Windows 10 for a little while, it will automatically lock itself. This is known as sleeping. When your device is sleeping, it is secure.

To wake up Windows 10 so that you can use your device, first either move your mouse, or tap the Spacebar. When the screen comes on, you'll need to unlock Windows 10. Press and hold down the Control and Alt keys and tap the Delete key.

Ctrl + Alt + Delete keys

When asked, sign in to Windows 10 with either your password, or, if you’ve set up Windows Hello, use the feature you set up.

Shut down Windows 10

It’s good practice to shut down Windows 10 at the end of each working day.

Now, to shut down Windows 10, click the Start button in the lower left corner of the screen. Then click the Power symbol and select Shut down from the pop-out menu.

The Shut down option from the Start menu

Test your learning

Feel like you have understood this session? Great, take a moment to complete this these steps:

  • Turn on your device.
  • Sign-in to Windows 10.
  • If you are not directly connected to the network, set-up a VPN connection.
  • Set-up one or more of Windows Hello Pin, Face or Fingerprint.
  • Lock Windows 10.
  • Unlock Windows 10.
  • Shut down Windows 10.

Get started

Skip to next session

Page 6 / 23