In this session, you’ll learn how to print from your Windows 10 device, collect your print outs and scan images and send them to yourself for later use.
Printing is a two-stage process. First you print your document, presentation or spreadsheet to a secure print queue, and then you visit a printer and collect your document.
To print your document, select the File tab in your Office application and select Print. Next select the printer that you want to use by selecting it from the drop-down list of printers. This will usually be the one that’s nearest to your location, but it’s up to you.
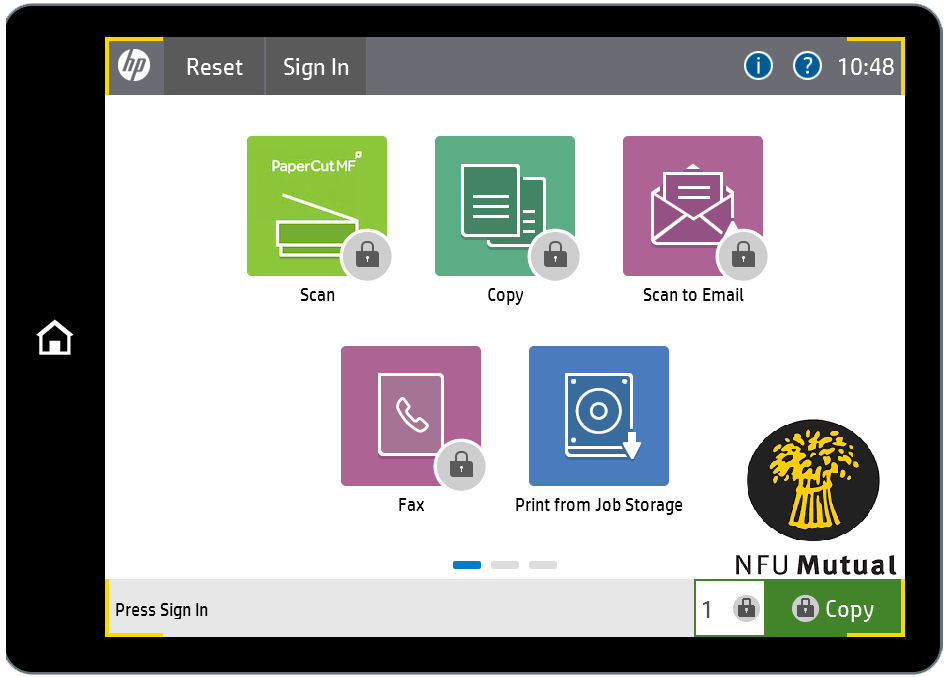
To scan a document, you'll need to sign-in to the printer.
To unlock all the printer's features, tap Sign In and follow the on-screen instructions to provide your username and password.
Once signed in, the on-screen icons will all unlock and you'll be able to access the functions.
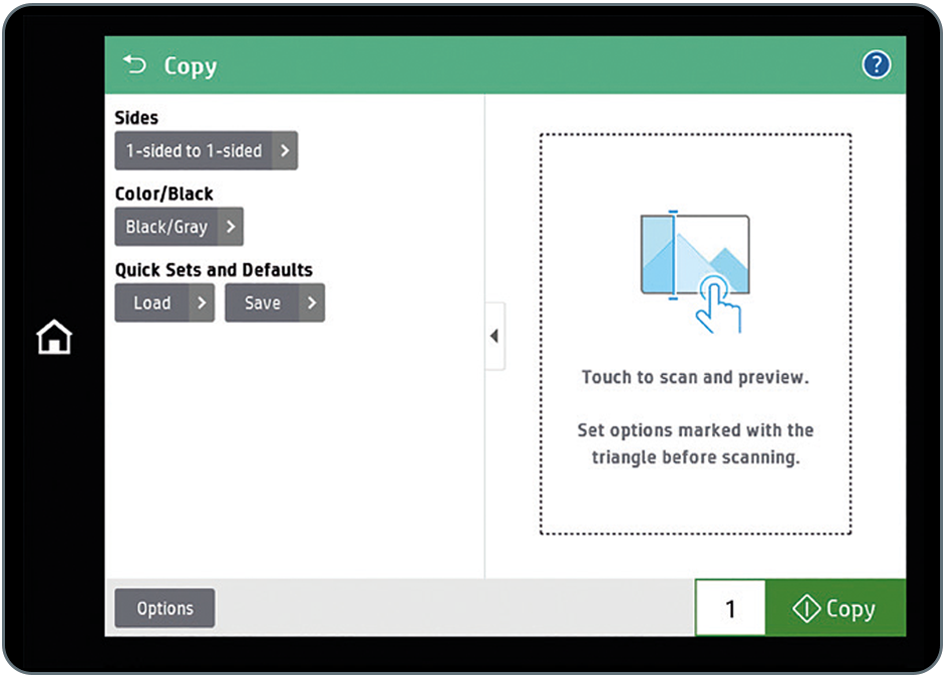
When you want to photocopy one or more sheets of paper, load the pages you want to copy into the document feeder and tap the Copy option.
Select the copy options you need, and when you are ready, tap Copy.
First, ensure that you have signed-in to the printer.
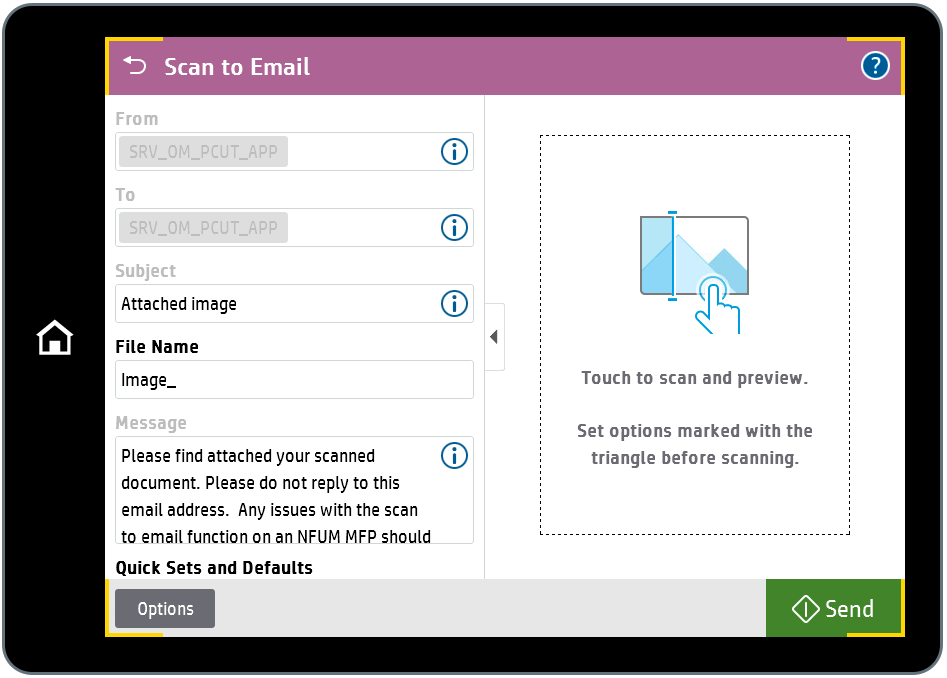
Tap the Scan to Email option.
Next place the items to be scanned into the document feeder, or if the item you are scanning is an odd size, place it directly onto the scanning glass.
All scanned material will be sent to your email address as an email attachment. You cannot change the email address to which your scan is sent. You can give the email subject a name and give the scan a filename of your choosing. Simply tap into the text boxes on the printer’s console and type slowly using the on-screen keyboard.
If you want to see a preview of the scan, tap the space to the right of the console.
When you are ready to start the scanner, tap Send.
And that’s it, your material will be scanned, and the resultant file will be emailed to your mailbox.
Using the new printers, you can now also scan directly to your OneDrive, simply by clicking the button 'Scan.'
When you select this button, you will receive an email with confirmation of your scan being available to send to OneDrive.The first time you do this, you will receive a 24-hour authorisation link for Scans for PaperCut MF to send files to your OneDrive.
If the Microsoft authorisation seems to be taking some time, press 'cancel' and enter your password and it will then allow you to authorise the link.
Once authorised, you can find your scanned documents located in C:\Users\[USER ID]\OneDrive - NFU Mutual\Apps\Scans for PaperCut MF.
First, ensure that you have signed-in to the printer.
Tap the Scan to OneDrive option.
Next place the items to be scanned into the document feeder, or if the item you are scanning is an odd size, place it directly onto the scanning glass.
To change the scanning options, such as one sided to two sided, tap Change settings.
When you are ready to start the scanner, tap Start.
Your material will be scanned, and the resultant file will be placed within your OneDrive.
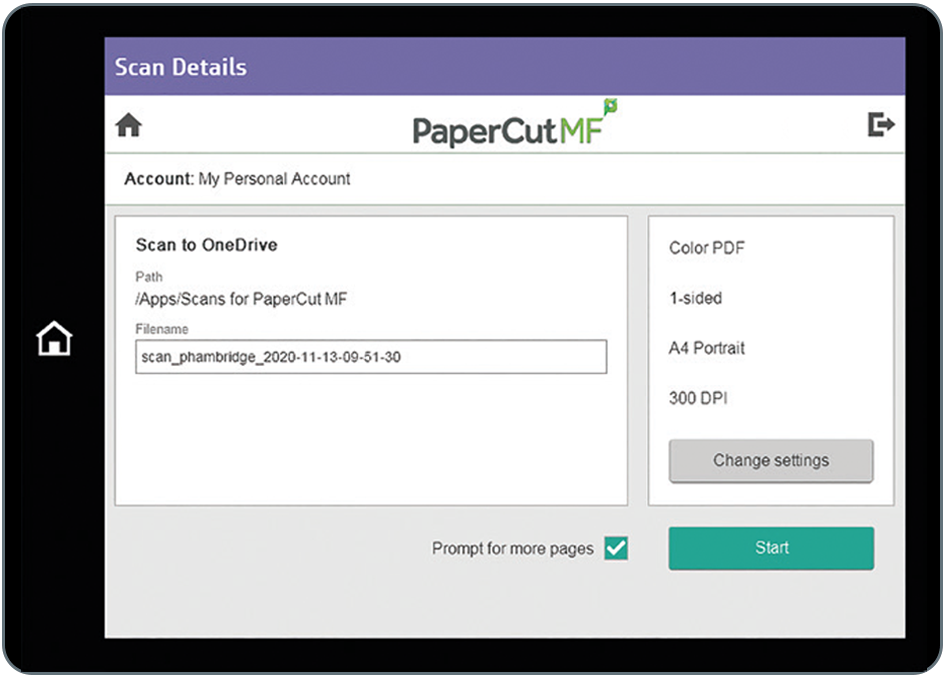
The first time you scan a document to OneDrive, you will receive an email to validate your access. You need to grant access within 24 hours of receiving the email.
When you have finished using the printer, tap the Home button on the left edge of the printer’s console, so that it’s ready for the next user.
Feel like you have understood this session? Great, take a moment to complete this these steps: